Androidプログラミング日記 (仮)


まずは
新しいプロジェクトを作りました。名前を「Botan」にしてファイルを開くと「BotanActivity.java」ができているので開きます。ついでに「layout」の「main.xml」と「values」の「String.xml」も開きましょう。
ファイル「main.xml」 <?xml version="1.0" encoding="utf-8"?> <LinearLayout xmlns:android="http://schemas.android.com/apk/res/android" android:layout_width="fill_parent" android:layout_height="fill_parent" android:orientation="vertical" > <TextView android:layout_width="fill_parent" android:layout_height="wrap_content" android:text="@string/hello" /> </LinearLayout> |
|
ファイル「String.xml」 <?xml version="1.0" encoding="utf-8"?> <resources> <string name="hello">Hello World, BotanActivity! <string name="app_name">Botan </resources> |
これを変更追加
ファイル「main.xml」 <?xml version="1.0" encoding="utf-8"?> <LinearLayout xmlns:android="http://schemas.android.com/apk/res/android" android:layout_width="fill_parent" android:layout_height="fill_parent" android:orientation="vertical" > <TextView android:id="@+id/TextView01" android:layout_width="fill_parent" android:layout_height="wrap_content" android:text="@string/hello" android:textSize="12pt" /> <Button android:id="@+id/Button01" android:layout_width="fill_parent" android:layout_height="wrap_content" android:text="@string/Button01" /> </LinearLayout> |
|
ファイル「String.xml」 <?xml version="1.0" encoding="utf-8"?> <resources> <string name="hello">ボタンを押してね。 <string name="Button01">クリック <string name="app_name">Botan </resources> |
ファイル「BotanActivity.java」 package and.roid;
import android.app.Activity;
import android.os.Bundle;
public class BotanActivity extends Activity {
@Override
public void onCreate(Bundle savedInstanceState) {
super.onCreate(savedInstanceState);
setContentView(R.layout.main);
}
}
|
||
ファイル「BotanActivity.java」
					package and.roid;

import android.app.Activity;
import android.os.Bundle;
import android.view.*;
import android.view.View.OnClickListener;
import android.widget.*;

public class BotanActivity extends Activity {
  private TextView text1;
  @Override
  public void onCreate(Bundle savedInstanceState) {
  super.onCreate(savedInstanceState);
  setContentView(R.layout.main);

  text1 = (TextView)this.findViewById(R.id.TextView01);
  Button btn1 = (Button)this.findViewById(R.id.Button01);
  btn1.setOnClickListener(new MyClickAdapter());
  }

  class MyClickAdapter implements OnClickListener {

    public void onClick(View view){
     text1.setText("クリックしました!");
    }
  }
}
|
text1 = (TextView)this.findViewById(R.id.TextView01); こういう難しいコードが出たときは日本語で考えてみるのがいいですね。 「テキスト設定した変数text1 に main.xmlで設定しているidTextView01を取り出す」 という感じでしょうか。 Button btn1 = (Button)this.findViewById(R.id.Button01); も同じですね。「ボタン設定した・・」になるだけですね。main.xmlで設定しているid○○を取り出すていうのがfindViewByIdというコードぽいですね。 |
|
実行の構成を変えて実行してみると
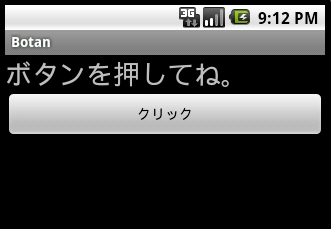 |
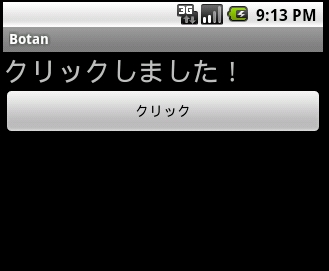 |
「クリック」と書かれたボタンを押すと上記のテキストがかわりました。
イベントリスナー
ボタンを押したら○○する。とかクリックしたら○○とかタッチしたら○○もそうですが、ユーザーが何かした、こういうことを「イベント」といいます。このイベントをが発生したときにその処理を代行するのが「イベントリスナー」といいます。
今回はボタンをクリックした時のイベント処理をするのに「OnClickListener」というイベントリスナーを用意しまし。これを「OnClickListener」でButtonに組み込んでいます。「setOnClickListener」というメソッドで登録するのですが単独では使えないメソッドなので「MyClickAdapter」というクラスを作り、このクラスから呼び出すようにします。「OnClickListener」には「onClick」というメソッドが用意されていて、クリックイベントで呼び出されるメソッドで、ここに処理を書けばボタンをクリックしたときの動作ができるようになります。今回は最初にtext1にセットされたmain.xmlに登録されているid「TextView01」に入っている「ボタンを押してね。」を「クリックしました!」に変更しています。
おまけ
「BotanActivity.java」の「MyClickAdapter」クラスをちょっと改造
| class MyClickAdapter implements OnClickListener {
public void onClick(View view){ |
こちらのほうがいい感じですね。
レイアウトは、エディッターで部品をドラッグして配置するやり方もあるのですが、写真など撮るのがめんどくさかったのと、ついでにコードも勉強できるということもあったので、こういう形にしました。自分で何かアプリを作るようになったら色々試してみようと思います。
ちょっとづつ役に立つコードが出てきますね。がんばっていきましょう!